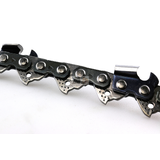
Keeping your chainsaw razor sharp is essential for safety and efficiency. A properly sharpened chainsaw chain slices through Australian hardwoods like butter, whereas a dull chain will struggle and burn the wood.
In this guide, we’ll explain how to sharpen a chainsaw step by step, covering both manual filing and using electric sharpeners. You’ll learn how to sharpen a chainsaw chain correctly, including filing techniques, adjusting depth gauges (rakers), and even a bit of bar maintenance. Whether you’re a weekend woodcutter or a seasoned bush user, these tips will help your saw cut faster, safer, and cleaner – just like new.
Busting Common Chainsaw Sharpening Myths
Before we dive into the how-to, let's clear up some dangerous misconceptions that could put you and your chainsaw at risk:
Myth #1: You only need to sharpen when it stops cutting
This is both wrong and dangerous. A dull chainsaw increases kickback risk and reduces efficiency. Sharpen regularly when you notice longer cutting times, fine sawdust instead of chips, or smoke during cutting.
Myth #2: Any file will do
Wrong file sizes can damage your chain. Different chains need specific file diameters based on their pitch and gauge. Always check your manual for the correct size.
Myth #3: No protective gear needed
Sparks and debris fly during sharpening, and there's always risk of contact with sharp teeth. Always wear eye protection, gloves, and work in a well-ventilated area.
Myth #4: It's easy to sharpen a chainsaw
Proper sharpening requires precision and attention to detail. Improper technique can reduce performance, increase fuel consumption, and create safety hazards.
Myth #5: Only pros need to sharpen regularly
Even occasional users benefit from regular sharpening. A dull chain increases fuel consumption and engine wear, regardless of usage frequency.
Myth #6: Filing angle doesn't matter
The angle is crucial for optimal performance. Wrong angles cause uneven cutting, reduce chain life, and increase kickback risk. Always follow manufacturer specifications.
Myth #7: Electric chainsaws never need sharpening
Electric chainsaws have chains that require regular sharpening just like petrol saws. They may need less maintenance overall, but the chain still dulls with use.
Now that we've busted those myths, let's get into the proper sharpening process.
Safety First: Preparing to Sharpen
Before you start sharpening, do a quick prep for safety and convenience:
- Shut Off and Stabilise: Make sure the chainsaw is off. If it’s a petrol saw, engage the chain brake and consider clamping the bar in a vice. For electric saws, unplug or disconnect the battery. The saw should be secure and the chain unable to move while you work, preventing accidents.
- Inspect the Chain: Check for any damaged or broken teeth. If a cutter is missing or severely chipped, you might be better off replacing the chain for safety. Also ensure the chain is properly tensioned – it should not be sagging loose. A properly tensioned chain will stay in the bar groove but still move by hand with a glove on. This tension keeps the angles consistent as you file.
- Clean the Bar and Chain: Use a brush to remove oil, sawdust, and grime from the chain, bar, and sprocket area. This not only spares your file from clogging up with gunk, but also lets you see the etched angle marks on the teeth (if present) and any reference indicators on your file guide.
- Mark Your Starting Point: It’s easy to lose track of where you began sharpening. Mark the first tooth you plan to sharpen with a dab of coloured marker or a bit of tape. Usually, people start with a particular tooth (often one of the shorter teeth on the chain) and work their way around. Marking prevents you from going around twice or missing any teeth.
Now you’re ready to sharpen.
How to Sharpen a Chainsaw Chain (Step-by-Step)
Sharpening a chainsaw with a file is straightforward with practice. Here’s how to sharpen a chainsaw chain by hand like a pro:
- Hold the File at the Correct Angle: Most chainsaw cutting teeth are filed at a 25° to 35° angle relative to the chain (check your manufacturer’s specs; 30° is common for cross-cutting). If you have a file guide, it will have angle lines to align with the bar – use those to set the file angle. Place the file into the first cutter’s gullet (the curved area just under the tooth’s top plate) and hold it level, tilting up slightly (around a 5° upward tilt) so that about 20% of the file’s diameter is above the top plate. This ensures you’re sharpening the tooth’s cutting edge properly. Remember to file from the inside of the tooth to the outside, in one direction only – push the file through the cutter with smooth, even strokes. Do not drag it back on the return stroke, as the file only cuts in one direction (lift it or at least release pressure on the backstroke). Typically, give each tooth 2-5 strokes (try to do the same number for each tooth) or as many as needed until you feel it’s sharp. You’ll know it’s sharp when you see shiny bare metal on the cutting edge and it “grabs” the file a bit. Each stroke should remove a tiny curl of metal – you might even see faint sparks on a good stroke, much like sharpening a knife.
- Maintain Consistent Angles and Pressure: As you proceed, ensure every stroke is at the same angle and height. Consistency is key – it’s what separates a good sharpening job from a wonky one. Use your shoulders and arms to push the file; do not just “wrist it”, as that tends to change the angle. If you’re new to this, go slow. Visualise the cutter tooth as a little chisel – you are sculpting its edge to be square and sharp. All cutters should be filed to the same angle and length; otherwise the saw will cut in curves. A file guide tool greatly helps maintain this uniformity.
- Work One Side at a Time: Sharpen every second tooth (the ones angled in the same direction) all around the chain. For example, file all the “right-hand” cutters (teeth that slope to the right when facing you) first. Advance the chain to the next tooth using the saw’s chain, or by releasing the chain brake slightly if needed to slide the chain along, then re-engage it to hold for filing. Repeat the same number of strokes and technique on each cutter. Once you loop back to your starting mark, flip the saw (or move to the other side of the bar) to tackle the other set of cutters – the “left-hand” teeth that slope opposite. Now file these remaining teeth at the same angle (usually 30° from the other side). Tip: It may help to reposition your body rather than filing awkwardly across yourself – stand on the other side of the saw or turn the saw around. Consistency and comfort matter.
- Sharpening Depth Gauges (Rakers): After you’ve sharpened all the cutting teeth, the depth gauges (also known as rakers or drags) need checking. These are the stubby hooks in front of each cutter. They act as guides that limit how deep the tooth bites into the wood. Place a depth gauge guide (a small flat tool with a slot for the cutter) over the chain so a raker pokes through the slot. If the raker is taller than the guide’s slot (meaning it protrudes above the guide), use a flat file to file it down level with the guide. Usually every 2-3 sharpenings, you’ll need to take a little off the rakers. Be careful not to over-file the rakers – if they’re too low, the cutters will take too deep a bite, making the saw grabby and prone to kickback. Many depth gauge tools are labelled for the proper clearance (like 0.025″ for standard chains). Work your way around, filing each raker that sits too high. This step is crucial for fast, safe cutting – even if your teeth are razor sharp, the saw won’t cut well if the rakers are preventing them from digging in.
- Finishing Up: Once all teeth and rakers are done, your chain should be sharp and ready. Remove any filing dust from the chain (a quick wipe or brush). If you removed the chain for sharpening (as some prefer when using a bench vise or electric grinder), refit it on the bar and tension it correctly. A properly tensioned chain should snap back to the bar snugly and still move freely when you pull it by hand (with the brake off). Finally, lubricate the chain (most saws have automatic oilers, but ensure the oil reservoir is full) and double-check the chain brake function. You might also lightly dress the bar rails – if you feel burrs on the bar’s edges (from normal wear or a thrown chain), a few strokes of a flat file will remove them and help the chain run straight.
By following the above steps, you now know how to sharpen a chainsaw chain using basic hand tools. It might feel fiddly the first couple of times, but with practice you’ll get a feel for it. Many Aussie hobbyists actually find the process satisfying – a sharp chain rewards you immediately the next time you cut firewood or clear storm debris.
Using an Electric Chainsaw Sharpener (12V & 240V)
While hand-filing is great for touch-ups and in-field use, you can also sharpen a chainsaw with dedicated electric sharpeners. These devices grind the cutters quickly and precisely, saving time and effort:
- Bench-Top 240V Sharpeners: These are powered grinders that usually mount on a bench. You remove the chain from the saw and mount it in the grinder’s clamp. Set the grinder’s angle (degrees) according to your chain type (e.g. 30°), and adjust the depth stop so it only grinds enough to sharpen the cutting edge without taking off too much. Then you bring the grinding wheel down on each tooth. The machine grinds each cutter tooth to a precise sharp edge in seconds. Bench sharpeners often let you set the tilt angle and cutter angle, taking out a lot of the guesswork. Because the angles are “worked out in advance” by the machine’s settings, you don’t need to be an expert to get a consistent result. They are excellent for when you have multiple chains to sharpen or one that’s been rocked (dull from hitting debris) and needs significant sharpening. The downside is you need mains power (240V in Australia) and the machine is a bit of an investment.
- Portable 12V Sharpeners: These smaller grinders attach right onto your bar, similar to a file guide, and run off a 12-volt source (like a car battery or portable power pack). They’re popular in the field – for example, farmers or arborists can hook the sharpener to a 12V battery from the ute or tractor. Despite being smaller, they work on the same principle: a high-speed grinding stone that you set at the correct angle, then press into each cutter tooth to sharpen it. They often have angle guides and depth gauges built-in. A 12V sharpener lets you touch up your chain on the tailgate during a day’s work in the bush, without manual filing. Just be gentle and let the tool do the work – press too hard and you can overheat the tooth or remove too much material.
Tips for Electric Sharpeners: Whether 240V or 12V, always read the manual for your sharpener model. Wear eye protection as sparks will fly. Use light pressure – let the grinder wheel nibble away the metal; too much force can blue (overheat) the tooth, ruining its temper. Typically, you’ll sharpen all the left-facing teeth, then adjust the machine or your position to do all the right-facing teeth, just like hand filing. Electric sharpeners make quick work of a dull chain and are very easy to use for beginners. Just remember, even though the machine is doing the sharpening, you still need to check depth gauges separately (some high-end electric sharpeners have attachments for this, or you do it manually after grinding the cutters).
Why a Sharp Chainsaw Chain Matters
Safety
A dull chainsaw isn’t just slow – it’s dangerous. Dull teeth tend to snag and increase the risk of kickback, where the saw jolts backward unpredictably. In a worst case, a blunt chain can get stuck and then fling the saw toward you. By contrast, a sharp chain bites into wood smoothly, greatly reducing kickback chances. Even occasional users should sharpen regularly – don’t wait until the saw “stops cutting” to sharpen, as some myths suggest. Running a saw dull makes it labor and can lead to accidents.
Better Cutting Performance
When sharpened properly, a chainsaw will cut quickly and cleanly without bogging down. You’ll produce big wood chips instead of fine sawdust, and the engine won’t have to work as hard (which can even save a bit of fuel). Think of it like a knife: a sharp knife slices effortlessly, whereas a dull one tears and struggles. Similarly, a sharp chainsaw chain glides through gum trees or pine logs with minimal effort, making your yard work or bush chores much easier on you and the saw.
Prolonged Tool Life
Regular sharpening also extends the lifespan of your chainsaw. How? First, sharp teeth mean less chance of the chain catching and getting damaged mid-cut. Second, you inspect the chain closely each time you sharpen, so you’re more likely to spot any damaged or loose rivets before they become a problem. Finally, the motor (or your muscles, in the case of a manual saw) doesn’t have to strain as hard when the chain is sharp. All this TLC means your chainsaw – whether it’s a trusty Stihl, Husky, or an Ozito – will serve you well for years.
Optional: Use a Chain Vice for Easier Sharpening
If you're looking for a more stable and efficient way to sharpen your chainsaw chain, consider using a saw chain vice. This tool can be mounted to your workbench or attached using a bench vice, holding the chain securely in place while you sharpen. It works with all sizes of chainsaw chains, making it versatile for any sharpening job. Once the chain is positioned in the vice, simply lock it in place with the clamp-down handles, allowing you to easily rotate the chain for precise filing. The vice allows for hands-free sharpening, which helps ensure accuracy and efficiency. It's a great addition to any workshop, especially if you sharpen chains frequently.
For more details on how to use a saw chain vice, check out the video demonstrating its setup and use.
When to Sharpen Your Chainsaw Chain
Not sure when to sharpen a chainsaw chain? Here are tell-tale signs and situations where you should sharpen up:
- After Hitting Dirt or Debris: Hitting any hard object is a fast ticket to a dull chain. If you accidentally strike the ground, a rock, or embedded nails in a log, your chain’s cutting edge may dull immediately. Even just cutting into soil can take the edge off your teeth. Stop and sharpen if this happens – continuing to cut with a damaged, dull chain will give poor results and could further damage the chain.
- After Long Storage: If your chainsaw has been sitting in the shed for months, it’s a good idea to sharpen it before the next use. Metal can dull due to micro-corrosion or simply from last season’s use. A quick touch-up ensures your chainsaw blade (chain) is ready for action when you need it.
- When Cutting Feels “Off”: Trust your instincts. If the saw isn’t biting like it used to, or you find yourself forcing it through wood, it’s likely dull. Other signs include the saw pulling to one side (indicating one side of the chain’s teeth are sharper than the other) or fine sawdust coming out instead of thick chips. If you notice cutting is slower, or you see smoke even though the chain is oiled and tensioned properly, it’s time to sharpen. Regularly sharpening before the chain gets terribly dull is best – professionals often touch up the chain every time they refuel the saw, to keep it performing optimally.
Tools and Equipment for Sharpening a Chainsaw
Before diving into how to sharpen a chainsaw blade, gather the right tools. Using proper equipment will make the job easier and ensure consistent results:
- Correct Size Round File: Chainsaw teeth are sharpened with a cylindrical file. The diameter of the file must match your chain’s cutter size (common sizes are 4.0mm, 4.8mm, 5.5mm, etc., corresponding to 3/8″, .325″ pitch chains, etc.). Using the wrong file size can ruin the tooth geometry– too large and you won’t sharpen the cutting edge, too small and you’ll gouge too deep. Check your chain’s specs or manual for the right file diameter.
- File Guide or Filing Jig: A file guide is a handy tool that attaches to the file or bar and helps maintain the correct filing angle and depth. It’s like training wheels for sharpening, ensuring you hold the file at (for example) a 30° angle consistently on every stroke. Many guides also rest on the chain’s top plates to keep the file at the proper height. This is great for beginners to achieve a pro-level edge without guesswork. Bar-mounted filing jigs (see image below) clamp to the bar and guide your file – very useful for accuracy.
- Depth Gauge (Raker) File and Guide: In addition to sharpening the cutting teeth, you’ll need a flat file and a depth gauge guide to adjust the rakers (the small shark-fin piece in front of each cutting tooth). The depth gauge controls how deep the tooth bites into the wood. After multiple sharpenings, the teeth get lower, so the rakers need filing down to keep the correct height difference (usually around 0.5mm to 0.8mm, depending on chain type). A depth gauge tool (a flat piece that lays across the teeth) lets you file the rakers to the perfect height in relation to cutters.
- Chainsaw Vice or Clamp: It’s important to stabilise the saw while sharpening. A bench vice works if you’re in the workshop – lightly clamp the bar (not the chain itself) to hold the saw steady. If you’re in the field, a stump vice (a small vise that you pound into a log stump and clamp your bar) is an Aussie bush sharpener’s best mate. This secures the saw so you can use both hands for precise filing.
- Safety Gear: Even though the saw’s engine will be off, don’t skip safety. Wear gloves – sharp teeth and fresh burrs can cut you even when the chain is static. Eye protection is a must since metal filings or grinding sparks can flick up. If you’re using a grinder, ear protection is wise too. And remember to disengage the power source (unplug the electric saw or remove the battery, and for petrol engines, set the brake and remove the spark plug lead to prevent any chance of a start).
- Cleaning Tools: A stiff brush or rag to clean debris from the chain & bar, and a screwdriver or thin tool to scrape out the bar groove (for bar maintenance) will come in handy. Clean equipment makes for easier sharpening and more accurate results.
Bar Maintenance Tips for a Straight Cut
A sharp chain is only part of the equation – chainsaw bar maintenance is also important for effective cutting. Over time, the guide bar wears and can cause cutting issues even if the chain is sharp. Here are some bar maintenance tips to keep your saw cutting straight and true:
- Flip the Bar Regularly: Each time you sharpen the chain or every few uses, flip the guide bar upside down when re-installing the chain. Bars wear more on the bottom (due to cutting pressure and gravity). Flipping distributes wear evenly, prolonging the bar’s life. Many pros flip the bar every time they refill fuel or swap chains.
- File Burrs Off Bar Edges: Running a chainsaw creates burrs – tiny raised edges – along the bar’s sides. When the chain comes off or during heavy use, these burrs can interfere with cutting. After removing the chain, feel along the bar’s rails; if you notice rough, sharp edges, use a flat file to file those burrs off. File at a slight angle inward, so you don’t round off the edges (you want to keep the bar rail corners square). Removing burrs lets the chain sit properly in the groove.
- Clean the Bar Groove and Oil Holes: Wood dust and grit can pack into the bar’s groove. Periodically, take a thin tool (a groove cleaner, or even a putty knife/old screwdriver) and scrape out the bar groove along its length. Also, ensure the oil passage holes are clear so that chain oil can flow freely. A clean groove allows the chain to run straight and get proper lubrication.
- Dress the Bar Rails: Besides burrs, the bar rails can wear unevenly, sometimes getting low in the middle (creating a slight concave) or they may wear at a slant if you often cut at an angle. A specialized bar dresser tool can resurface the rails flat and parallel again. In a pinch, a mill file or a belt sander can be used carefully to true up the bar’s top surface. This ensures the chain’s drive links have even, full contact and the saw cuts straight. If the bar is extremely worn or the groove is wide and the chain slops side-to-side, it may be time to replace the bar.
- Proper Chain Tension and Lubrication: After sharpening and reassembling, always adjust your chain tension. Temperature changes and the act of filing can slightly alter tension. A well-tensioned chain should snap back to the bar when pulled. Also, keep the chain oiler filled with quality bar oil – good lubrication reduces wear on both the chain and bar, especially important in Australia’s hot, dusty conditions.
By maintaining your bar along with a sharp chain, you ensure your saw cuts straight (no crooked cuts or wandering off-line) and the cutting efficiency is maximised. A well-cared-for bar and sharp chain combo will make cutting tasks feel almost effortless.
Choosing the Right Chainsaw Sharpener (Hand Files to 12V/240V Kits)
Now that you know how to sharpen a chainsaw and the tools involved, you might be thinking about upgrading your sharpening kit. There are plenty of options, from simple files to professional grinders. The choice comes down to your use-case and comfort:
- Hand Filing Kits: Perfect for the casual user or if you mostly sharpen in the field. These kits typically include the correct size round file, a file handle, a file guide, a flat file for rakers, and a depth gauge tool – everything you need in one pouch. Hand files are inexpensive and light to carry. With a bit of practice, a manual kit can sharpen a chain just as sharp as a machine. If you’re often out bush without power, a file kit is a must-have.
- Bar-Mount Manual Sharpeners: These tools (like the one pictured above) clamp to your bar and guide the file for you. They add a bit of setup time but take out the human error of holding angles by eye. They’re great for meticulous sharpeners who want every tooth exactly the same. It’s a manual system, so no electricity needed – good for remote work. The trade-off is a slightly slower process than free-hand filing because you might need to adjust the jig for each tooth, but accuracy is top-notch.
- 12V Electric Sharpeners: Ideal for those who want easier, faster sharpening on the go. If you often ask “how do I sharpen a chainsaw in the field without lugging a heavy grinder?” – a 12V sharpener is the answer. These can run off a vehicle battery or portable 12V source. They are compact enough to take camping or farming. Brands like Hurricane and others make 12V sharpeners that Aussie farmers trust. Just clamp it on the bar, set your angles, and power through the chain in a few minutes. As mentioned, they remove the physical effort but still require a bit of care in setup.
- 240V Bench Grinders: Best for home workshops, especially if you go through chains frequently (e.g., semi-professional use, firewood businesses, tree loppers). These plug-in sharpeners can rejuvenate even the dullest chains quickly, grinding with precision and consistency. Modern models often have angle guides and sometimes even automatic chain feeding. In Australia, you’ll find bench sharpeners that run on standard 240V mains power – ensure the model you get matches Aussie electrical standards. Keep in mind you’ll need a workbench or stable surface to mount these. They’re a bit bulky, but nothing beats the speed – you can sharpen a chain in a minute or two once it’s set up.
Jono & Johno offers a wide range of sharpening tools and accessories for Aussie users. You can find everything from quality files and file guide kits to chainsaws, all in one place. Having the right tool makes sharpening easier and even kind of enjoyable – it’s a great feeling when your saw slices through wood cleanly and you know it’s because you sharpened it correctly!
Final Thoughts: Keep It Sharp, Keep It Safe
By now, you should feel confident about how to sharpen a chainsaw chain on your own. To recap, always sharpen before your chain gets excessively dull, use the proper tools (and don’t forget your rakers and bar maintenance), and take your time to get the angles right. A sharp saw is not only a pleasure to use – it’s safer and more economical. You’ll get more work done in less time and put less strain on your saw’s engine and on yourself.
Remember, even the best chainsaw needs regular sharpening. It’s normal maintenance, just like tuning up a ute or sharpening a mower blade. Make it a habit to check your chain’s sharpness frequently. With a bit of practice, you’ll sharpen your chainsaw like a true pro. Now go grab that file or sharpener, and happy cutting – your freshly sharpened chain will make quick work of that wood heap in no time!
Related Blogs: